
Hello, home design enthusiasts!
Welcome back, and happy day to all our fellow DIY aficionados. Today, we’re taking a nostalgic journey back to a significant turning point in our bungalow’s transformation – a time when our hallway, the very artery of our home, looked like a relic from a forgotten era. Do you remember those “before” days?
Indeed, it’s a look most of us would rather forget! That old, funky hand-etched paneling was, to put it mildly, an eyesore. From the moment we first received the keys to our beloved bungalow, I knew with absolute certainty that getting rid of that dated wall treatment would be one of our immediate priorities. It cast a dull shadow over the entire space, making an already narrow area feel even more cramped and uninviting. This project wasn’t just about aesthetics; it was about reclaiming the character and warmth that our home deserved.
Transforming the Unsung Hero: Why Your Hallway Deserves a Makeover
It often feels like hallways are the unsung heroes of our homes. They are far too frequently overlooked, dismissed as mere transitional spaces, solely serving the utilitarian purpose of guiding us from one room to another. But imagine the missed opportunity! These compact sections of square footage possess an incredible potential to deliver a significant “wow” factor, to infuse personality and charm into the very core of your living space. Who says these essential pathways can’t be just as bold, inviting, and fun as any other room within a home? They absolutely can, and I am a firm believer that a hallway with a touch of unexpected sass truly elevates the entire home’s ambiance. A well-designed hallway creates a sense of flow, provides visual interest, and can even influence the mood as you move through your residence, making the journey from room to room an enjoyable experience rather than just a functional necessity.
For this crucial space, I was determined to incorporate a bold, captivating pattern. For what felt like an eternity, my heart had been utterly captivated by Thibaut’s exquisite Tanzania wallpaper. Its intricate design and sophisticated aesthetic perfectly encapsulated the vision I had for a vibrant, statement-making hallway. It promised to bring an exotic elegance and a dynamic energy that would transform the dull corridor into a focal point.
via
I mean, just look at it – it’s utterly fabulous! The sophistication, the unique pattern, the luxurious feel… it’s everything you could wish for in a statement wallpaper. However, as is often the case with dream designs, there was the rather undeniable hurdle of the price tag. Let’s be real, investing in such a high-end wallpaper wasn’t exactly compatible with our renovation budget. So, I resorted to my tried-and-true method: finding a brilliant DIY solution to achieve a similar high-end look for a fraction of the cost. My search led me directly to my favorite stencil source, Royal Design Studio. Their extensive collection of artistic stencils offers endless possibilities for custom wall treatments. For this project, the Cheetah Spots Wall Stencil immediately caught my eye, promising to deliver the exotic, bold pattern I craved without breaking the bank.
Laying the Groundwork: Professional Drywall Repair is a Smart Investment
Before any creative work could begin, we had to address the aftermath of removing the old paneling. This process revealed some significant wall damage and several areas that urgently needed patching up. While I’m certainly not afraid of a good DIY challenge, drywall repair is one area where I draw the line. I’ve ventured into large-scale drywall repairs before and quickly learned that for me, it’s a task best entrusted to seasoned professionals. The meticulous skill required to achieve perfectly smooth, seamless walls is a craft in itself. Investing in professional drywall repair was not just about saving time; it was about ensuring the job was done flawlessly and efficiently, providing the perfect canvas for our upcoming design endeavors. It was money incredibly well spent, guaranteeing a smooth and durable foundation for our new hallway aesthetic.
Drywall repair is a skill that truly requires precision and experience. Attempting to DIY a large area can lead to visible imperfections that will haunt your walls no matter how much paint you apply. By bringing in experts, we were able to quickly and correctly address all the structural and aesthetic issues, leaving us with perfectly prepared walls. This crucial step ensured that our stencil work would look professional and polished, without any underlying bumps or inconsistencies detracting from the final result. It’s a testament to knowing when to call in the cavalry for specialized tasks, allowing us to focus our DIY energy on the creative parts we truly enjoy.
Embracing the Challenge: Stenciling a Statement Wall
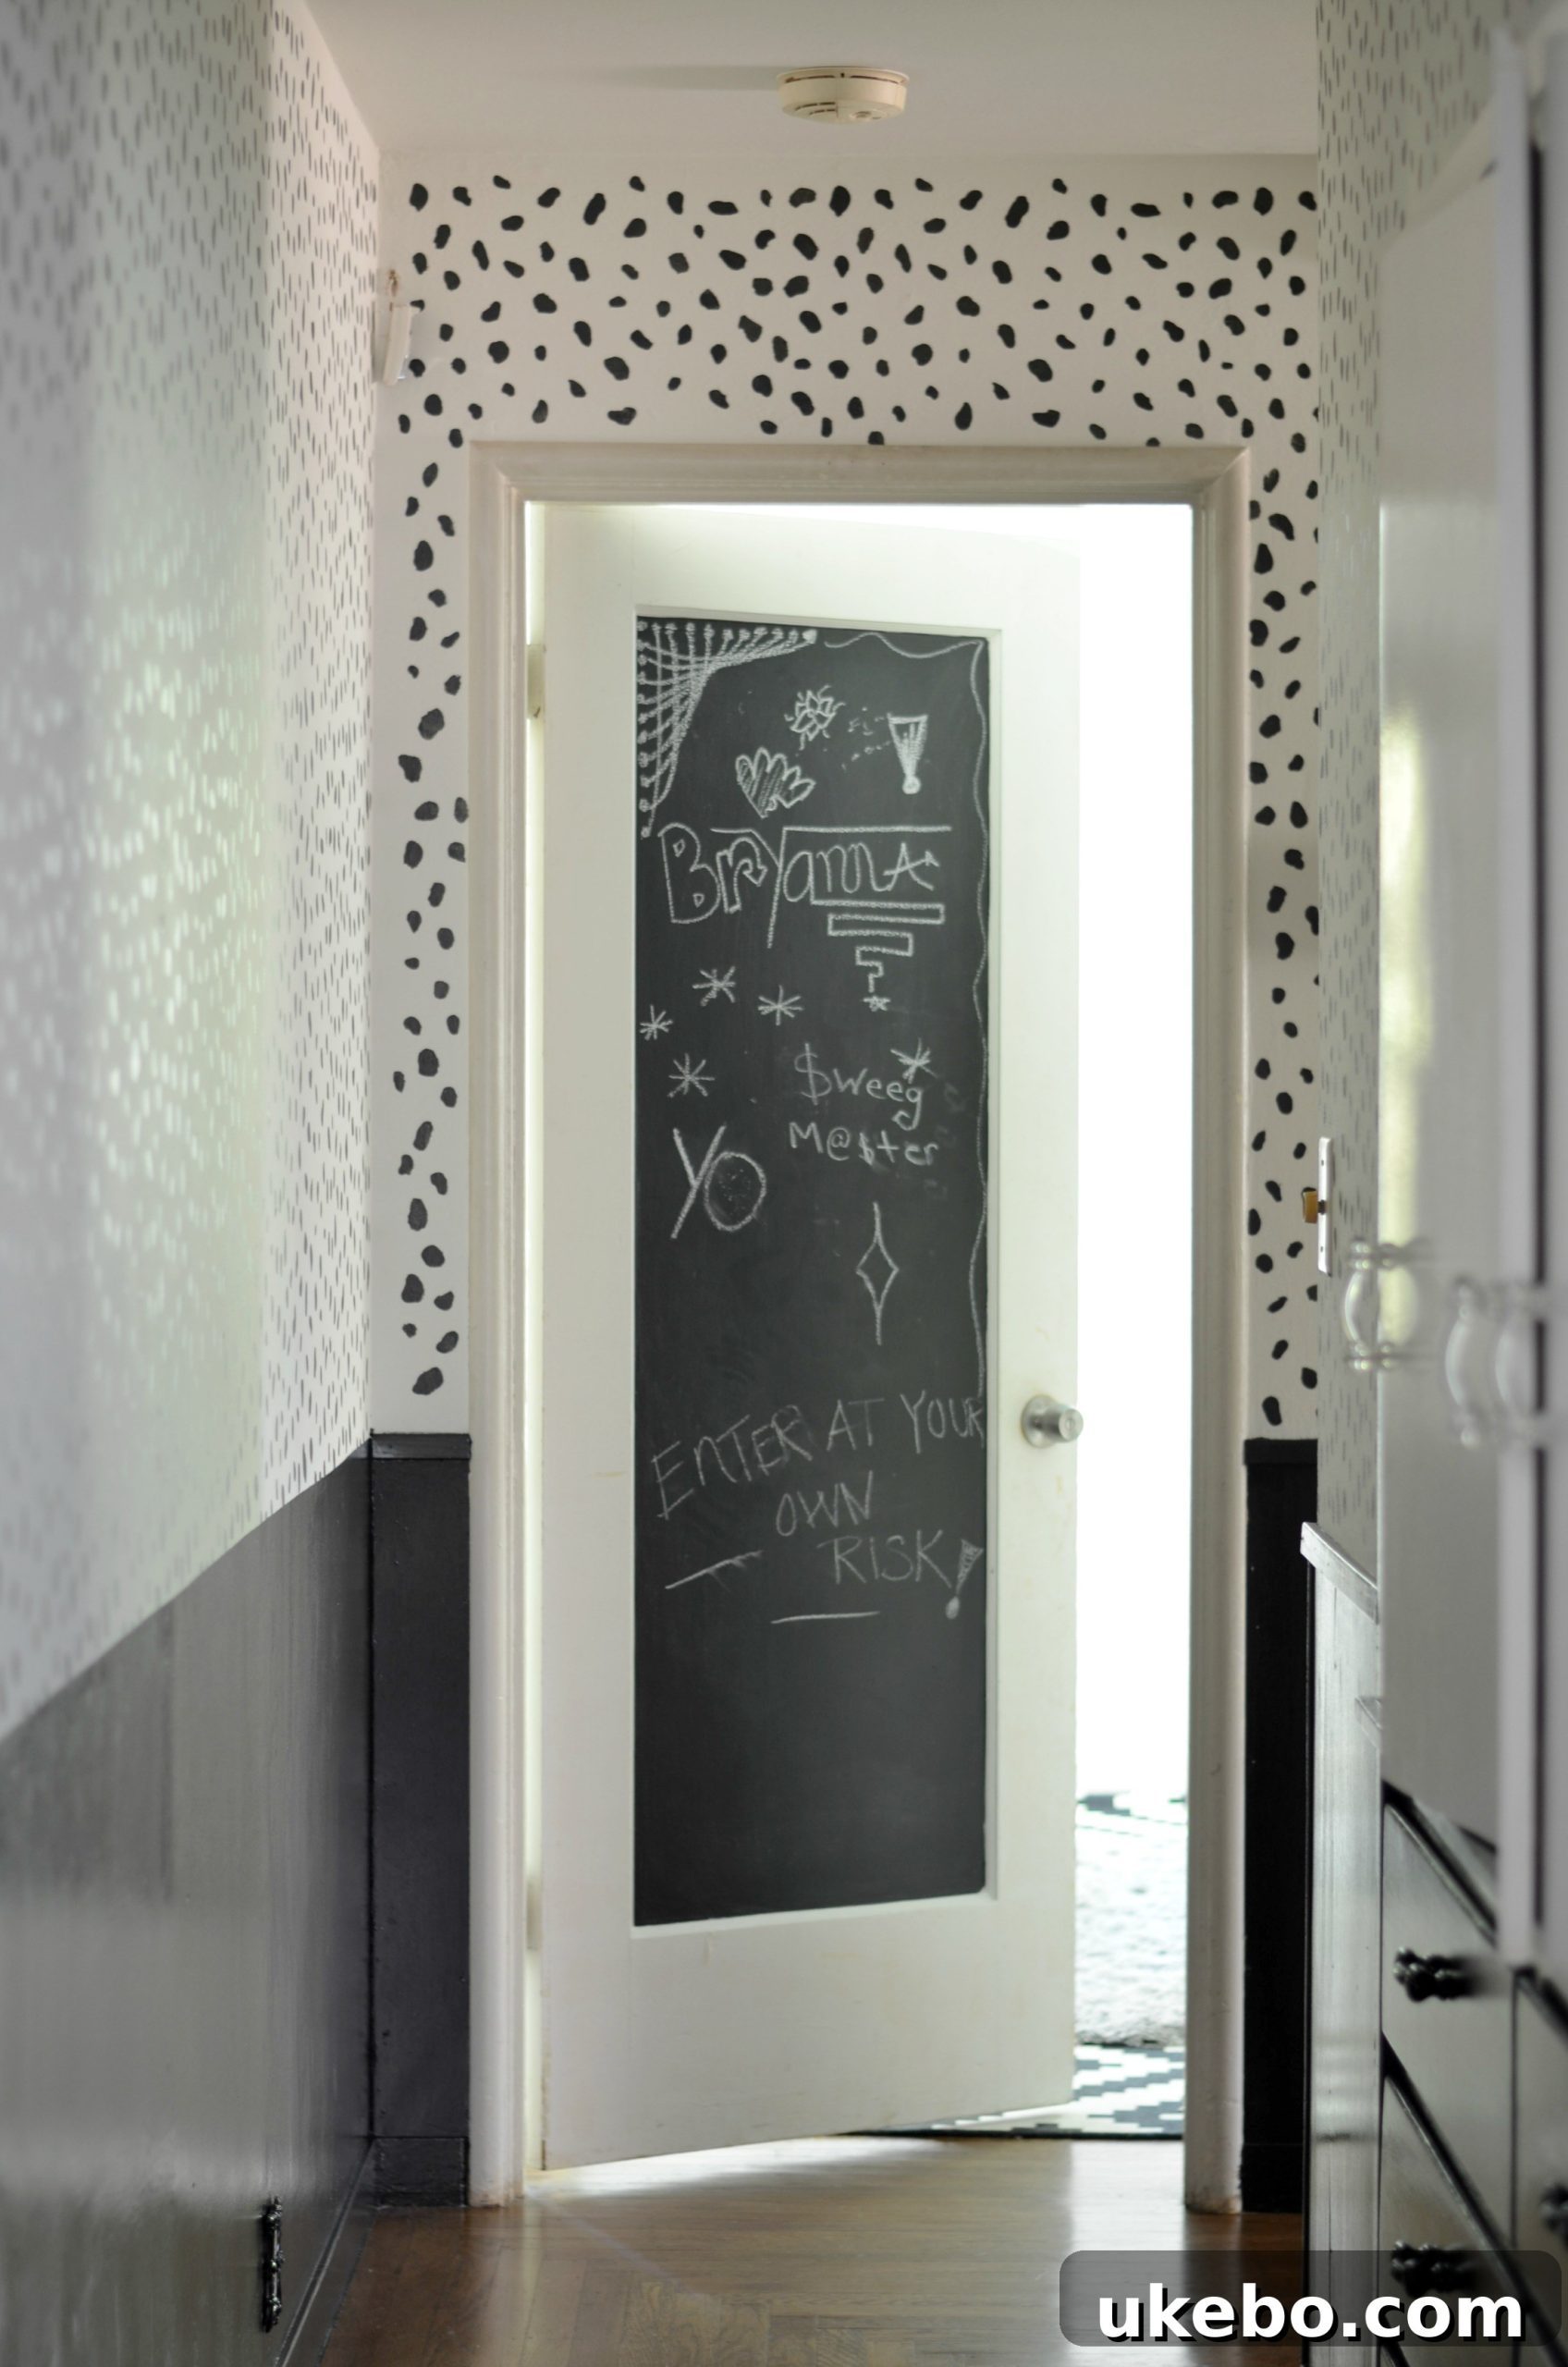
With the walls perfectly prepped and smoothed, it was time for the fun to begin! After giving the ceiling and the upper portion of the walls a couple of refreshing coats of crisp white paint – setting a bright and clean backdrop – I eagerly delved into the stencil process. Now, if you’ve followed our journey, you’ll know I’m certainly no stranger to working with stencils. I’ve successfully transformed both a kitchen floor and a porch floor using this versatile technique. However, stenciling a wall was a new frontier for me. I must confess, working with a floor provides a distinct advantage – gravity is on your side! On a wall, gravity presents a bit more of a challenge, requiring a steady hand and a bit more physical effort to keep the stencil perfectly aligned and prevent paint from bleeding. Despite this, the process was still remarkably straightforward. Once I found my rhythm and established a consistent groove, things progressed fairly quickly. A fair warning for anyone considering a similar project: your arms will absolutely feel the burn by the end! But the effort, as you’ll soon see, was entirely worth it.
Given the summer vacation schedule and having the kids at home, I wisely allotted myself a full week to tackle this ambitious project. This allowed for flexibility and ensured I didn’t rush the intricate stenciling process. The careful planning and sustained effort truly paid off, as I am absolutely thrilled with the final outcome. The transformation is dramatic and exactly what I envisioned, proving that patience and perseverance are key to achieving stunning DIY results.
Bold Choices and Thoughtful Details: The Finished Look
For the lower half of the walls, I made a striking choice: high gloss black. And let me tell you, I absolutely adore it. This bold decision creates a dramatic contrast with the crisp white and the dynamic cheetah print above, grounding the space and adding a touch of sophisticated edge. I’m well aware that flat paint is typically the go-to finish for camouflaging wall imperfections, a common characteristic in older homes like our bungalow. Our walls certainly have their quirks and historical undulations, but in this instance, I simply didn’t care to hide them. Instead, I embraced the character and patina of our home, allowing the high gloss finish to celebrate these unique details rather than obscure them. The reflective quality of the high gloss black also brings a subtle sheen, enhancing the light in an otherwise narrow and often dimly lit space, creating an unexpected depth and elegance.
Since this hallway is naturally quite narrow and can feel dark, I made a conscious design decision to help the built-in elements visually recede and integrate seamlessly into the overall scheme. I achieved this by painting them two-tone, echoing the black and white palette of the walls. This approach allows the built-ins to maintain their functionality without visually crowding the space, making them feel like an intentional part of the wall rather than separate, bulky additions. To further elevate their appearance and introduce a touch of vintage charm, I replaced the old, unremarkable hardware with exquisite antique glass pulls from D. Lawless Hardware. These delicate, sparkling accents catch the light beautifully and add a layer of refined detail, perfectly complementing the eclectic yet cohesive aesthetic we were striving for.
Looking Ahead: Illuminating and Softening Our Hallway
During the drywall repair phase, we also took the opportunity to run new electrical wiring for a much-needed ceiling light in the smaller, darker section of the hallway near the bathroom and my son’s room. That particular area gets incredibly dark, which, as any parent knows, can be a little unnerving for a child during late-night potty runs. So, I am currently on the hunt for the perfect lighting fixture to brighten that space, focusing on both functionality and aesthetic appeal. Additionally, as you can see in some of the “after” pictures, the main hallway still sports its old, somewhat drab ceiling light fixture. This too is on my list for an upgrade, aiming for something that will complement the new bold design and provide ample, warm illumination. As a final touch to enhance both comfort and style in this freshly transformed area, I also plan to introduce a couple of runners. My hope is to find either vintage kilim or boucherouite rugs – their vibrant patterns, rich textures, and unique history will add warmth, character, and a much-desired global flair, while also softening footsteps and adding a layer of inviting coziness to our newly vibrant hallway.
It’s an incredibly satisfying feeling to be able to cross another significant project off our ever-growing home renovation list. Slowly but surely, piece by piece, our beloved bungalow is truly coming together, reflecting our personal style and embracing its unique history. Each completed project brings us closer to the dream home we envision. Until next time, friends, keep designing, keep creating, and keep making your home uniquely yours!
Xo-Shavonda
Sources: Upper walls-Ben Moore Dove White/Spots-Martha Stewart Francesca in Eggshell (already had in my paint stash)/Lower walls & Built in-Francesca in High Gloss/Upper Built In-Dove White in High Gloss/Hardware-D. Lawless/Stencil-Royal Design Studio
*This post is in partnership with Royal Design Studio, who provided me the stencil. All thoughts and opinions are my own. I was also provided the hardware by D. Lawless Hardware. They are of seriously good quality and I highly recommend them.